Feeds:
Posts
Comments

Many of you asked for our recipe for this White Chicken Chili that we’ve been serving up to our pro-sports team. It’s yummy and hearty and a nice change of pace from our usual standby favorite. Give it a try and let us know what you think!!

539625_10151264206862499_4950982_n

White Chicken Chili

makes about 8 servings

2 lbs boneless, skinless chicken breast

olive oil, as needed

salt and pepper

1  cup diced onion

2 poblano chilies, diced small

2 tbl minced garlic

1 jalapeno, diced small

2 tbl cumin

1 tbl ground corriander

4 tbl flour

4 cups chicken stock

2 15-oz cans white beans

2 cups fresh or frozen corn kernels

chopped cilantro, for garnish

grated jack or cheddar cheese, for garnish

Preheat oven to 375 degrees. Rub chicken with olive oil, salt and pepper and place on a baking sheet.

Roast for 20 minutes. Remove and let rest until cool enough to handle. Chop or shred into small pieces. Set aside.

In a large soup pot, saute the onions, poblanos, garlic and jalapeno in a drizzle of olive oil. Cook over medium heat until tender.

Add the cumin and coriander and a couple pinches of slat and pepper. Add the flour and cook for one minutes. Add the stock and stir.

Bring to a boil over high heat. Reduce heat and simmer for 20 minutes. Add the beans, corn and chicken. Cook for an additional 20 minutes.

Taste and season with more salt and pepper as needed.

Serve warm topped with fresh cilantro and cheese.

Enjoy!!

pilaf


How is it the end of January already?? I’ve hardly had time to declare my New Year’s Resolutions, let alone live up to them, and the first month of the year is already over. How did January fly by so fast? Maybe it’s the three (THREE!!) sports teams we’re catering for now (LA Galaxy, LA Kings and the regional NFL Combine)….that probably has a little something to do with what’s kept us so busy 🙂 All I know is that at the end of each day I’ve found myself standing in front of my fridge, holding the door open and staring blankly inside willing dinner to magically appear. While there hasn’t been any time for meal planning, I did manage to set one New Year’s Resolution that’s kept dinner on the table this whole month. My goal was to use up as many things as possible from my freezer and pantry — a kind of clean sweep for the new year. This has actually been a life-saver throughout this busy month. Less trips to the store and less meals out has kept me focused on fast and creative dishes at home. And I’ve been eating pretty well, too! There were those lovely rib-eye steaks I pulled from the freezer and grilled with a spice-rub made from the odds and ends of my spice cabinet (it may not be Summer, be we’re still grilling in the Southland!). There was that pint of chili from last Fall that went from freezer to table alongside some millet muffins one night. There was a toss of  artichoke raviolis, sun-dried tomato chicken sausage and toasted pinenuts, all rescued from the freezer.

While it’s been fun to clean out my freezer (turns out I had a lot of good stuff in there!!), I really needed to weed out my pantry. So I’ve baked some bread to use up a multitudes of flours and made many versions of hummus using up canned beans (turns out a mix of cannelini and pinto beans made a great dip!!). This weekend I’ll be making a rainbow-of-colors-lentil-soup thanks to the five different kinds of lentils I have (why did I save only 1/4 cup of lentils in each bag?? we’ll never know…).

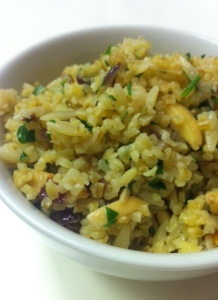
My best a-ha moment came when faced with three tiny bags — one with a small handful of quick-cooking bulghur, one with orzo and one with quinoa. Frustrated and unsure what to make with such small quantities, I decided to throw caution to the wind, cook them all together and make a pilaf. And guess what? It worked!! Not only did the grains all cook in the same time, but the side dish I threw together was delicious. With the help of a little caramelized onions, toasted almonds and fresh parsley, this pilaf couldn’t have been better if I planned it. Here’s what I did:

Pantry Pilaf

makes about 4 servings

1 tbl butter

olive oil

1/2 large onion, diced small (I used a red onion but any onion or shallot or even scallions would work)

1 tsp ground corriander

1/3 cup slivered almonds (or your favorite nut)

1/2 cup orzo

1/2 cup quick-cooking bulghur (Trader Joes has this now….or look for “fine bulghur” in other grocery stores)

1/4 cup quinoa, rinsed

1/3 cup chopped parsley

salt and pepper

In a large skillet over medium heat, add the butter and a small drizzle of olive oil. Add the onions and cook until they soften and just begin to turn golden. Add the nuts and corriander. Cook for 3-4 more minutes until almonds are fragrant. Remove from heat and set aside.

Meanwhile, bring a 4-quart pot of water to a rolling boil. Add a small handful of salt. Add the orzo, quinoa and bulghur. Stir and simmer for 10-12 minutes until all of the grains are soft. Drain, shake dry and dump all of the cooked grains into the skillet. Place the skillet back over medium-low heat and cook, stirring, until grains are all coated with onion mixture. Season with salt and pepper. Stir in the parsley. Serve warm.

Have fun raiding your pantry!

Hannukah is upon us. We can tell because when we walk into our kitchen the smell of potatoes being cooked in hot oil is heavy in the air. The latke-making has begun!!! We made 300 last week for our Latke To-Go orders. Turns out the only thing people love more than these little fried potato treats is not having to make them in their own kitchen!

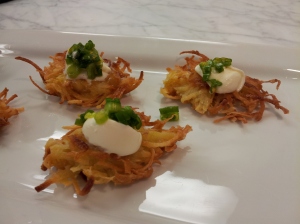
sweetpot latkes

I am far from a purist when it comes to classic dishes. As I’ve mentioned before, I’m genetically incapable of following a recipe exactly as written — I’m always adding a bit more of this or that. But when it comes to latkes, there is nothing I love more than a simple, crispy fritter made from four humble ingredients: potato, onion, flour and egg. I don’t even need applesauce on top. Just a sprinkle of salt and I’m good.

However, because I just can’t help myself, I decided to try to make a sweet potato version just for fun. I thought it would be nice to offer variety at one of our holiday parties — something a little sweeter and with some brighter flavors. I added some orange zest to the sweet potato and topped them with a quick scallion relish and tangy creme fraiche — they were a hit!! So in the interest of changing up holiday traditions, here is our recipe for a different kind of latke. Everyone is sure to love them but you’d better make some traditional latke, too, just in case 🙂

Sweet Potato Latkes with Scallion Relish and Creme Fraiche

makes about 30 pieces

3 large sweet potatoes, peeled and grated

1 tablespoon brown sugar

2 eggs, lightly beaten

3 tablespoons flour

1 tsp baking powder

1/2 teaspoon orange zest

1 teaspoon salt

canola oil, for frying

for the topping:

3/4 cup finely sliced scallions, whites & greens

1/2 teaspoon orange zest

1 tablepsoon fresh lemon juice

1 teaspoon honey

1/4 teaspoon red chili flakes

1 cup creme fraiche

Place the potatoes in a thick paper towel (or clean kitchen towel) and squeeze out any excess liquid. Place in a large bowl and add the sugar, eggs, flour, baking powder, orange zest and salt. Toss until well combined. Pour about 1/2-inch of oil into a large skillet and place over medium-high heat. To test if the oil is hot enough, drop a tiny bit of the potato mixture into the middle of the pan. If it sizzles, you are ready to go!

Place spoonfuls of the mixture into the hot oil and flatten slightly with a spatula. Cook until golden on the bottom and carefully flip (I like to use tongs for this.). Cook until browned on the second side and remove onto a paper towel. Continue to cook in batches until all the batter is cooked. Place the latkes in a 350 degree oven to heat back up if needed.

In a small bowl, combine the scallions, orange zest, lemon juice, honey and chili flakes. Season with a pinch of salt.

To serve, top the latkes with a dollop of creme fraiche and a bit of the relish. Serve immediately.

Happy Hannukah!!

There are few things I love more than gingerbread. Since I’m not much of a “dessert person,” the savory part of me loves the rebellious combination of spicy ginger and black pepper with sugar and molasses. For me, this is dessert, perfected, and I was thrilled to see it come up as this week’s TWD baking assignment.

gingerbread

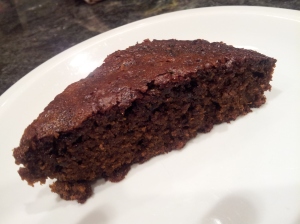
There are about a million different ways to make gingerbread, each with varying degrees and combination of spice. This recipe was very straight-forward, focusing on the simple ginger flavor, using ground and fresh ginger and a bit of black pepper to boost the heat. Then there were two unexpected additions: instant espresso and cocoa powder. I was surprised to be including these ingredients, but each provided a pleasant bitterness and grounded what could have been a too-sweet recipe. (check out the full recipe here)

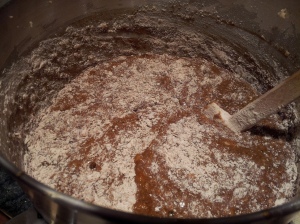
I love how easy this batter comes together — a quick mix of wet and dry ingredients and you are on your way to the oven. Don’t worry if your batter is lumpy — that’s normal and lends to an airy cake in the end.  I decided to make mine into one 9-inch cake but if I were serving it at a party, I would do mini cakes for sure so that every got an equal amount of crispy-cake-edge and moist-sticky-cake-inside.  Either way, this is such a simple cake and should definitely be your dessert staple this holiday season. It’s full of winter spices, makes your house smell amazing and tastes perfect paired with a mug of hot apple cider (with or without a splash of bourbon).

gingerbread - batter

In the end this cake had a lovely sharp bite — the combination of the spicy and bitter ingredients made for a very “grown-up” gingerbread. Perhaps a challenge for someone expecting a very sweet and only slightly gingery cake, but I loved it. Next time I would add a bit of cinnamon, a pinch of nutmeg and a pinch of cardamom to give a bit more depth to the spicy flavor….but mostly because I look for any excuse to add cinnamon and cardamom to desserts.

While the cake is delicious on it’s own, it begs for a bit of something creamy on top to cut through the spice. My favorite choice: some Greek yogurt flavored with a bit of honey and lemon zest. Gingerbread AND Greek yogurt — now I’ve got two of my favorite things on one plate. Life is good 🙂

Happy Holidays!


Thanksgiving is less than 48 hours away and it’s time to make your final lists, fight the lines at the grocery stores one more time and start cooking. We’ve already talked about how to handle the bird and the gravy — the two main attractions on most holiday tables. Now it’s time to discuss the dressing…or is it stuffing?? More on that later. While many of you have a “mom’s-classic-version” of dressing that shows up every year in your feast but maybe you’re looking for a way to mix things up this year. My suggestion: make mom’s classic AND a new version — you can never have too much dressing on the table. Here’s a hit-list of things you need to know to make amazing dressing:

1. It’s “stuffing” if it’s baked inside the bird and “dressing” if it’s baked in a casserole dish. We are not a fan of stuffing — yes, it benefits from the turkey flavor BUT in order for it to cook to a safe temperature (where all that raw turkey juice is cooked properly), there’s a good chance you’ve over-cooked your turkey breasts and that’s just sad. So stuff the turkey with aromatics (apples, onions, sage) and stuff the “dressing”in a casserole dish. If you really want to boost the dressing with turkey flavor, make your own turkey stock and use it in the stuffing.

1a. A side note: to make turkey stock, combine 2 turkey legs (buy them at the butcher counter in your store), 1 onion, 2 carrots, 2 celery stalks, 2 bay leaves and a tbl of peppercorns in your largest pot. Fill with cold water. Bring to a boil and immediately reduce heat to simmer. Simmer for 3-4 hours. Let cool. Strain and discard solids. Use the stock for your dressing, gravy and/or freeze it for later.

2. First, choose the bread. For a basic stuffing, a good white loaf is fine. But try using brioche for some sweetness or a good whole grain for some nuttiness. Whatever you choose, DON’T toast the bread!!! Just cut it into large (1-inch at least) squares and leave it in a bowl on your counter overnight to dry out. You want stale bread but NOT toasted bread. It seems counter-intuitive, but the drier your bread is, the mushier the dressing will be in the end. The goal is soft dressing but not a mushy mess.

3. Use any mix of aromatics: onions, leeks, carrots, fennel, celery, celery root, parnips. Sautee these in plenty of butter and you’ve got a great flavor base.

4. Use a little meat. I like a little bacon or pancetta sauteed up with the aromatics. A good sausage is always nice, too…..

5. Use poultry seasoning. No it’s not the same thing as the “flavor pack” in a Stovetop box. It’s a just-right mix of dried herbs and it’s essential for that “thanksgiving” flavor.

6. When in doubt, finish with browned butter. A rule we can live by for so many dishes! Once you’ve got your dressing mixed together and tucked in the casserole dish, drizzle with some browned butter and it will take the dish over the top! In the recipe below, we brown butter, toss in some sage leaves and then use them both to top the dressing — pretty and delicious!!
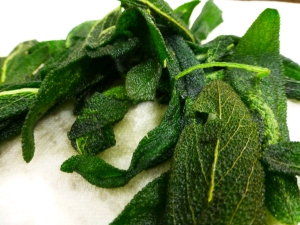
Here’s our favorite dressing recipe this year — a little sweet, a little nutty and really moist. Whatever version you make this year, enjoy!!

Brioche Dressing with Caramelized Fennel, Fuji Apples & Pancetta
Serves 8-10 people
olive oil
8-10 fresh sage leaves
1/2 cup diced pancetta
4 tablespoons unsalted butter
2 cups thinly sliced fennel
2 Fuji apples, diced small, skin-on
1 cup diced white onion
salt and pepper
12 cups brioche, cut into 1-inch cubes, left on the counter overnight to dry out
2 tablespoons poultry seasoning
2-3 cups chicken stock
2 tablespoons cold unsalted butter
Preparation
Butter a 9×11-inch casserole or baking dish.

Heat a large skillet over medium-high heat. Add olive oil to coat the bottom of the pan. When hot, add the sage leaves and cook until they begin to shrivel and become crisp. Using a slotted spoon, remove the leaves and set aside.

Add the pancetta to the same pan and cook until golden and crisp.

Add the 4 tablespoons of butter; when melted add the fennel, apples and onions. Cook for about 5 minutes or until the onions and fennel are tender. Season well with salt and pepper to taste.

Preheat the oven to 375 degrees.

In a large bowl, combine the brioche cubes and the cooked vegetables (be sure to scrape the pan and add all the flavored butter and oil from the bottom). Sprinkle in the poultry seasoning and toss to combine evenly. Add 1 cup of stock and toss to combine. Add more of the remaining stock until the mixture is moist but not soggy.

Spoon the mixture into the prepared baking dish, topping with the crispy sage leaves and dot with the 2 tablespoons of butter.

Cover with foil and bake for about 20 minutes – remove foil and cook for another 10-15 minutes or until golden.

It’s 80 degrees out and Thanksgiving is next week. No matter how many years I live in Los Angeles (13 so far), I will never get used to a warm weather turkey-day. It just doesn’t make sense to eat things like mashed potatoes, gravy, creamy vegetable gratins and pumpkin pie while wearing a tank top and flip-flops. But the holiday stops for no (wo)man so like it or not, it’s time to talk turkey.

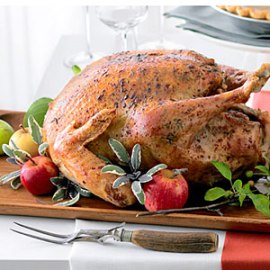
Every year around this time the panicked emails start. Is it necessary to brine the bird? What do you do if your turkey is still frozen Thanksgiving morning? How big of a turkey do I need to buy? How can you tell when the turkey is done? Never has a humble bird caused so much culinary stress. But no need to worry! If you’re not among the lucky few coming to our Thanksgiving 101 class, we have decided to share our list of important turkey facts here. Most importantly, remember that this is a holiday about sharing food with the people you love and being taking a moment to be grateful — no one will really care if the turkey is a little dry. The real secret? Always make lots of extra gravy — it can cover up any Thanksgiving meal mistake.


TURKEY 101
• Get fresh! Frozen birds tend to dry out quicker during cooking. Organic, Free-Range and Kosher
turkeys are all great – but the most important thing is that it’s fresh.
• If you do get frozen, defrost for 4 days in the refrigerator OR submerge in a sink of cold water
(never warm or hot!) and let soak for about 12 hours, changing the water every hour.
• When buying a turkey, plan for 1 pound per person – this leaves ample leftovers.
• Don’t cook a bird over 18 pounds – it takes too long! If you need more turkey for a larger crowd,
buy an additional turkey breast (or two) and a couple turkey legs. These will roast in about 1-2
hours and can be done the day before – roast them and let rest and cool; then refrigerate until the
next day. Let them come back to room temperature and then carve the breast and place in a pan
with a little bit of turkey stock and cover with foil. Reheat at 350 degrees for about 30 minutes.
• The ONLY way to tell for sure if your turkey is done is to use a meat thermometer – don’t trust the
red “pop-up” buttons! Remove your turkey from the oven when the white meat is at 165 degrees
and the dark meat is at 170 degrees.
• Approximate roasting times for un-stuffed turkeys at 325 degrees:
o 10 – 12 lbs – 3 hours
o 12 – 14 lbs – 3 – 3 ½ hours
o 14 – 18 lbs – 3 ½ – 4 ½ hours
o 18 – 20 lbs – 4 ½ – 4 Âľ hours
• ALWAYS let your turkey rest, tented with foil, for at least 20 minutes before carving – this will
help the juices stay inside the meat and make for easier carving.
• Carving 101 – step by step, here’s how it’s done:
o First remove the twine and ties and stuffing (if you used).
o Bend the leg back at the joint and cut to remove. Repeat for the other leg.
o Make a large cut at the base of the breast, parallel to the table.
o Make thin slices down the breast, working from the outside towards the bone. Repeat for
the other breast.
o Bend the thigh back, revealing the joint and cut to remove. Repeat for the other thigh.
Then cut off dark meat and add to the platter.
o Cut off wings.
o Save the carcass for the best turkey soup!
Happy Thanksgiving!!

This is the kind of recipe that gives you faith in yourself as a baker, that makes you feel confident and sure in the kitchen and officially puts you in the camp of people who “just whip up a little something” when friends come over for Brunch. And thank goodness it is, because after last month’s bagel experiment, I was questioning whether I would continue with TWD. But then I remembered that this is a journey, that I’m becoming a better baker and that if I can throw together something as delicious and easy as these Buttermilk Crumb Muffins I must be doing something right (go here for the full recipe).

You have to love a recipe that requires nothing more than a bowl, a spoon and a baking pan. Usually I wouldn’t be able to restrain my impulse to tinker with a new recipe, adding a bit of this and a little of that. But this time I was in the midst of a busy week and was so happy to see this simple recipe that I made it to the letter and couldn’t have been happier.

Despite it’s ease, this recipe has some really smart take-away lessons:

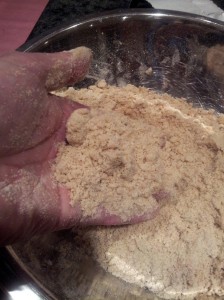
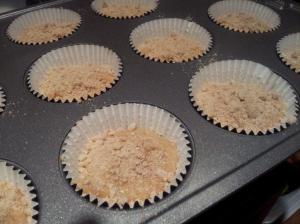
(1.) Pull back some of the dry mixture to use as a crumble topping — it’s the best part and I love the idea that I don’t have to make a separate crumble topping.

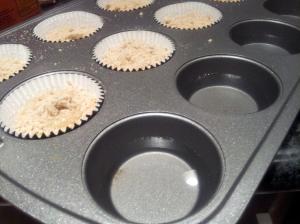
(2.) When you are making muffins and don’t have enough batter to fill all the tins, fill any empty muffin tin 1/2 way up with water so that you whole pan cooks evenly. Brilliant!!

(3.) Although this recipe calls only for shortening and the muffins turned out light and crumbly as a result, I think they could have used the flavor boost of butter or olive oil. I find most all-shortening baked good recipes to be a bit bland and prefer to swap out at least some of the shortening with butter or olive oil whenever possible — both of these full-flavor fats lend to more complex flavors in the finished product.

Speaking of next time, although these muffins were light and tasty and the perfect simple treat in a busy work week, I will certainly make some additions in the future. Perhaps dried cherries and toasted almonds, or diced pear and ground cardamom, or chopped banana chips and bittersweet chocolate….the possibilities are endless….I think these are going to be a new staple on our brunch catering menu.

Some things are a labor of love. And some things are just a labor. After doing this week’s TWD baking assignment, I’ve decided bagels are the latter. Don’t get me wrong — I love bagels and the ones I made were delicious. But were they more delicious than the fresh bagels I get on Sundays at my local shop? Not really. In the end, this should be chalked up as one of those projects done by people who really love making bread. I’m afraid I’m not one of those people.

All that being said, I am proud of myself for giving this “project” a go. After a first read-through of the recipe (find it here) I was pretty scared and considering skipping this round all together. There were just so many steps and in my experience lots of steps does not always make for a better recipes. So I put it off. And procrastinated some more. And then some more. And finally got down to business (you can see now why I’m 3 days late with this post!).

To get over my fear, I read and then re-read the recipe to see what I was getting myself into. As you know, I’m not really a baker. But I reminded myself that I decided to participate in TWD to get better at baking and here was another chance to face my fears. So here it goes. The recipe, however, was not comforting. It read something like this:

Work with half the dough at a time, each batch makes 5 bagels.

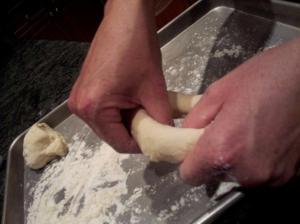
Shape the bagels: Stretch the dough into a purse-shaped ball, punch a hole, shape with your fingers and set aside to rest.

Boil the bagels: Boil in small batches because they can’t touch. Flip them over in the water. Take them out. Glaze them with egg white – the egg whites need to be strained (?!?) — glaze them quickly so they don’t stick and don’t let the glaze hit the pan because it can make the bagels stick.

Bake the bagels: Pour 2 cups of water in the bottom of your oven (yes, really) to create steam. Bake the bagels one rack at a time. Bake 25 minutes. Turn oven off. Bake 5 minutes. Open oven door. Bake 5 more minutes.

Now you’re done. Deep breath.

For a somewhat-non-baker like me, making this recipe feels like I’m cracking a code. True confessions: I made some adjustments. Not that I’m a rebel — I’m just an impatient person. Probably why baking and I are not always friends. So for any of you scared bakers out there, here are some short-cuts I took that worked.

1. I used regular unbleached flour, not high gluten or bread flour. Didn’t want to go around town finding the right flour.

2. I worked in 2 batches but shaped all the dough pieces at the same time.

3. I did one pan of bagels on parchment and one on an oiled pan per the recipe. Bagels stuck to the oiled pan so parchment won that technique contest.

4. I didn’t strain the egg whites. I was exhausted. I was impatient. I was starting to get angry at egg whites…and bagels. It was time to skip a step and this seemed like a good one. It all worked out in the end.

5. I tried to rush it and put both sheet pans in the oven at once on different racks — BIG mistake. The recipe was right. The bottom rack rose nicely but the top rack didn’t benefit from the steam.

6. I did do the 2 cups of water in the oven to create steam. LOVED this trick — very cool method to have up my sleeve. I kind of feel like a “real” baker having done something so cool.

In the end I had lovely, tasty bagels and, I’ll admit, was pretty darn proud of myself for making it through this recipe. Would I make them again? Probably not.

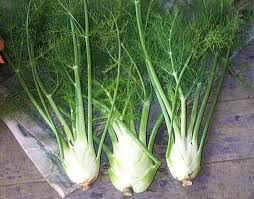
One of our favorite vegetables for Fall and Winter is fennel. It’s subtle anise flavor, lends a  certain sweetness that complements this season’s cooking perfectly. The best part about this root vegetable is it’s versatility. It can be eaten roasted, sautĂ©ed, braised or raw. While the white bulb is the most used part of this vegetable, don’t throw away the stems — they can be used to subtly flavor soups and stocks. The feathery fronds that sprout from the tops can be used as a finishing herb or added to salads and sauces. When it comes to flavor and bang for your buck, fennel is definitely the seasonal produce that packs a punch! Here are some of our favorite ways to use this Fall gem:

KEEP IT RAW
One of our go-to salads this time of year is an explosion of flavors and textures and it all starts with thinly shaved fennel (to shave it thinly, we recommend a hand-held slicer like the Kyocera ones – great tool to have in your kitchen). Then we have halved grapes, thinly shaved apples and leaves of watercress. We toss the whole thing lightly in a maple vinaigrette (maple, apple cider vinegar, lemon juice, salt, pepper and olive oil). This is a salad that makes you want to eat salads.

SWAP IT OUT
A great way to start using fennel is to swap it out for onions. Any time a recipe starts with some sautéed onions and garlic try using some fennel and garlic instead – you’ll notice it’s sweet, rich flavor in the background of dish. For instance, try caramelizing it in some butter and thyme in place of caramelized onions…..you’ll be eating this sweet concoction right out of the pan!

BRAISED & BROWNED
Leave it to the French to figure out the most luscious way to prepare fennel: braised in buttery stock and finish in the oven with cheese. To do this, cut the stalks off the fennel and then cut the bulb in quarters. Place in a pot with a couple pats of butter and enough stock to just barely cover the fennel. Bring to a boil, reduce the heat and simmer for 15 minutes or until very tender. Strain out the soft fennel and place in a shallow baking dish. Top with a sprinkle of parmesan or Gruyère cheese and some salt and pepper. Bake at 450 until golden and melted. A vegetable has never tasted so good!

Join us for our popular Global Comfort Food class to learn an amazing Fennel, Bread and Tomato Soup recipe that is perfect for cold Winter nights. If you already have Thanksgiving on the brain, we have you covered with our annual Thanksgiving 101 class, where we’ll demonstrate how to create a Brioche Dressing with Caramelized Fennel, Fuji Apples and Pancetta that is sure to become a family favorite!!

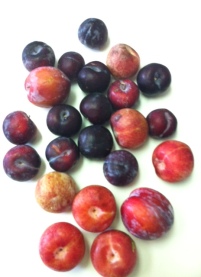
I love it when my kitchen is granted a moment of culinary serendipity. Like when you realize you have a bundle of tomatoes nearly too ripe AND the cilantro & lime needed to turn them into a quick salsa. Or when you have some leftover mashed potatoes AND you discover that last bit of ground beef in the freezer perfect for assembling a shepard’s pie. Or what happened this past week: I’d reached a stone fruit breaking point with over 6 lbs of assorted plums from the last few weeks of Farm Box deliveries threatening to take over my crisper drawer AND realized that this week’s TWD baking assignment was a basic whole wheat bread. Fresh baked bread was the only excuse I needed to turn all those plums into a huge batch of jam. A match made in heaven.

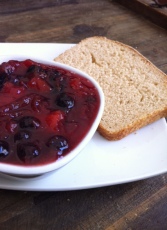
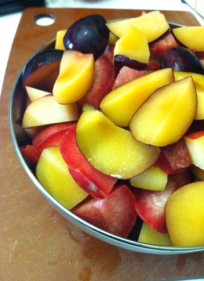
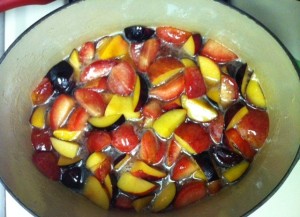
First, the jam. I used this recipe as my base — I like the method of cooking half of the fruit in a sugar syrup until soft and then adding the rest of the fruit. This leaves you with a lovely textured jam with bits of chunky fruit and bits of mashed fruit. I ended up combining three different varieties of plums with a basket of blueberries. And then, for a little twist, one lonely star anise pod — it may seem like a small, insignificant addition, but this tiny flavor bomb adds a complex “black liquorice” taste that blends so nicely with the plum’s acidity.

Once I had a huge pot of jam, it was time for the bread. The recipe (found here and here) is so, so easy. A few simple ingredients (whole wheat flour, bread flour, yeast, honey, salt and water) are combined, kneaded and left to rise. After a second rise in loaf pans, they’re ready for the oven. With about 2 hours of unattended rise time, this recipe does require some forethought — but ultimately  it’s very little actual work and such a simple endeavor. Within 5 minutes of the bread hitting the oven, my house smelled like a bakery — the smell alone is reason to bake bread more often. Is there anyone who doesn’t associate the smell of fresh-baked bread with happiness? It’s truly one of my favorite smells.

I let the bread rest as long as I could stand (about 22 minutes I think) and then carved off a slice and sat down to warm bread and homemade jam. The bread was truly the perfect bread for toast and sandwiches — a light crumb, a faint sweetness from the honey and not too heavy. The jam was sweet but not too sweet thanks to the tartness of the plums and a savory backbone provided by the star anise. Has anyone come up with a carb-only diet yet? I think I need to start one because I could eat this every day!